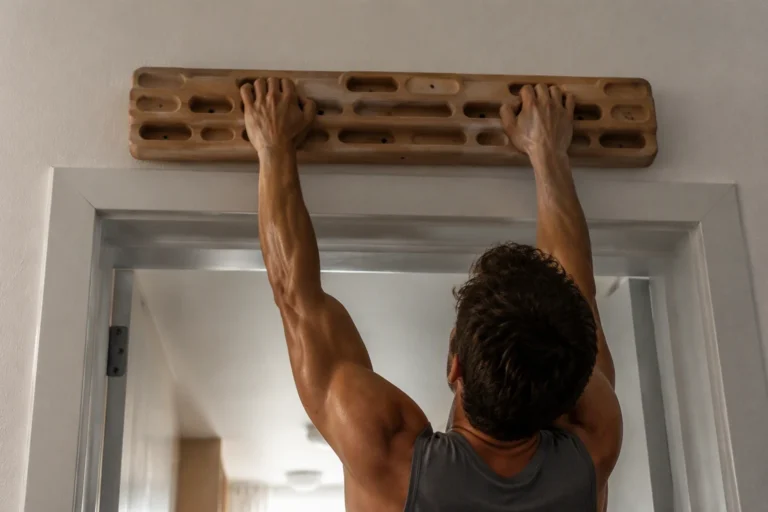










Unlock Your Climbing Potential: The Ultimate Guide to Hangboards
Hangboards are a powerful tool for climbers looking to improve grip strength and finger endurance at home. This guide covers the essentials of hangboard design, material differences, installation tips, and how to safely integrate hangboard training into your climbing routine. Whether you're new to climbing or seeking to break through a plateau, understanding hangboards can help you target your weaknesses and progress more efficiently.
If you’re tired of hitting a plateau in your climbing progress, you’re not alone. Maybe you’ve spent hours at the gym, watched countless technique videos, and still struggle to grip those elusive holds during your climbs. It’s frustrating when your fingers and forearms give out before your motivation does—especially if you feel like you’re training hard but not seeing tangible results. That nagging sense of limitation, when you can’t make the moves you know you’re capable of, is enough to make any climber question their approach.
Unlock your climbing potential—the ultimate guide to hangboards is here because you deserve to break through these barriers. For many climbers, finger strength is the missing link. Hangboard training offers a targeted solution, helping you build the grip endurance and power needed for both indoor sessions and outdoor adventures. If you’ve ever wondered why your progress stalls despite your dedication, it’s time to address the root cause and start training smarter, not just harder. With the right guidance and consistent hangboard practice, you’ll finally gain the strength to conquer new routes and redefine what’s possible for your climbing journey.
- Hangboards improve grip strength and finger endurance for climbers.
- Most hangboards are made of wood or high-density plastic for durability.
- Installation is straightforward with included mounting hardware.
- Proper training and progression help prevent injuries.
- Choosing the right hangboard depends on your skill level and goals.
Why Hangboard Training Matters for Climbers
Grip strength is a fundamental factor that can limit your climbing performance, whether you're tackling indoor routes or scaling real rock faces. The unique demands of climbing require you to hold onto tiny edges, deep pockets, and sloping surfaces—tasks that challenge your fingers and forearms beyond what most general fitness routines offer. Hangboard training directly addresses this gap by targeting the muscles responsible for grip, making it a practical way to improve your climbing ability at home or in the gym. If you’re looking to progress from V3 to V5 or break through a stubborn plateau, consistent hangboard sessions can provide the edge you need.

Hangboards are specifically designed to mimic various climbing holds using multiple pocket depths and edges. Most hangboards support weights up to 400 lbs, so you can safely add weight as your strength improves or practice with bodyweight hangs. Materials like solid wood and high-density plastic are common, providing durability and a reliable surface for your hands. Wooden hangboards are especially popular for their skin-friendly texture, minimizing abrasions during repeated use. With mounting hardware included in most models, installation at home—above a doorway or on a dedicated frame—is straightforward and usually takes less than 30 minutes.
Consistent hangboard use is key to seeing results. A typical beginner routine might involve three sessions per week, each lasting 20-30 minutes. You’ll perform hangs on different grip types, such as open hand, half crimp, and full crimp, holding each for 7-10 seconds and resting 2-3 minutes between sets. For example, try six sets of 10-second hangs on a 20 mm edge, with full recovery between each set. The steady overload on your finger flexors and forearm muscles triggers strength gains that translate directly to better climbing performance. Avoid rushing progress; increasing hang time or adding extra weight too quickly can lead to injuries like pulley strains. Stick to gradual increases—add 2-5 lbs or extend your hang time by 2 seconds once you feel comfortable.
Many climbers hit plateaus when their finger strength stops improving through regular climbing alone. Hangboard training can break these plateaus by isolating and progressively strengthening your grip muscles in ways standard climbing doesn’t. If you’re stuck on a grade or struggling with specific holds, targeted hangboard sessions allow you to focus on your weaknesses and track measurable progress. Mistakes to avoid include skipping warm-ups, training with poor form, or neglecting rest days. Always warm up for at least 10 minutes with finger stretches and light hangs before starting your main sets. By approaching hangboard training with discipline and proper technique, you set yourself up for steady gains and safer climbing sessions. The ultimate guide to hangboards is not just about equipment—it’s about building the foundation for lasting improvement.
What Features Should You Look for in a Hangboard?
"A multi-functional hangboard is the best way to train grip strength for climbing." This is true for most climbers. Hangboards with multiple pocket depths and edge types mimic the grips you encounter outdoors, letting you target different finger positions and muscle groups in your training routine.

"Any hangboard will work as long as you hang from it." This is false. Specialized hangboards offer various pocket depths and edge types, which help you simulate multiple climbing holds. If you choose a basic board with only one or two types of edges, you miss out on training the full range of grips needed for real-world climbing. For example, a board with shallow, medium, and deep pockets lets you practice both crimping and open-handed grips, preparing you for diverse routes.
When you’re shopping for a hangboard to unlock your climbing potential, start by considering the board’s multi-functional design. Boards with a variety of pocket depths and edge types are ideal for building finger strength and grip endurance. Look for models that include shallow edges (10-15mm), medium holds (20-25mm), and deep pockets (30mm or more). This range allows you to customize your workouts and focus on the specific grips you need for your climbing goals. A board with multiple options means you can do 5 sets of 10-second hangs on shallow edges, then switch to longer hangs on deeper pockets without changing equipment.
Material is another crucial factor. Most hangboards are made from either solid wood or high-density plastic. Solid wood boards are durable and gentle on your skin, making them a good choice if you train frequently or have sensitive fingers. High-density plastic boards provide excellent grip and are often more affordable, but they may feel harsher on your skin during long sessions. If you’re planning to train 3-4 times per week, investing in a wooden board can reduce skin wear and improve comfort. On the other hand, plastic boards are easy to clean and resist sweat buildup. Price-wise, wooden hangboards typically range from $70 to $120, while plastic models can start at $50.
Don’t overlook weight capacity. Most hangboards are rated to support up to 400 lbs, which is more than enough for nearly all climbers. This ensures you can safely add extra weight to your hangboard sessions as your strength improves. If you weigh 180 lbs and want to use a 30-lb weight vest, a board with a 400-lb capacity gives you plenty of margin. Always check the manufacturer’s specs before buying. Improper installation can lower the board’s safe weight limit, so use the included mounting hardware and follow the instructions closely. Avoid mounting a hangboard on drywall alone—always anchor into solid wood or masonry for stability.
Choosing the right hangboard comes down to your training needs and environment. If you want versatility and comfort, a multi-functional wooden board is a solid investment. If budget and easy maintenance matter most, high-density plastic will serve you well. Just be sure you have at least three pocket depths, a sturdy mounting setup, and a weight capacity that covers your training plans. Avoid boards with limited hold types or questionable mounting instructions—they can restrict your progress and pose safety risks.
"Wooden hangboards last longer and feel better on your skin than plastic models." This is generally true. Solid wood hangboards are known for their durability and smooth surfaces, which are less likely to cause abrasions even after multiple 15-minute sessions each week.
"Hangboards made from plastic always wear out faster than wooden boards." This is false. High-density plastic hangboards are engineered for durability and can withstand frequent use. While they may feel harsher, their longevity rivals wood if maintained properly and used according to the manufacturer’s recommendations.
"Hangboards help climbers build grip strength effectively."True
This is true. Hangboard training is widely recognized for improving finger and forearm strength, which are essential for climbing. Consistent use can help climbers develop the specific grip strength needed for more challenging routes.
"All hangboards are made from the same material."False
This is false. Hangboards are typically made from either solid wood, which is valued for its durability and skin-friendly surface, or high-density plastic, which often provides a grippier texture. Material choice impacts comfort and longevity.
How to Safely Install a Hangboard at Home
Hangboards are an effective tool for improving grip strength, but safe installation is key to both your training success and your home’s integrity. Nearly all modern hangboards include mounting hardware, making the setup process straightforward for most users. However, skipping the manufacturer’s installation instructions can put you at risk of injury or property damage. Take the time to read the guidelines step by step before you start drilling.

Start by selecting a strong mounting surface. A solid wooden beam or a masonry wall is ideal, as these can easily support a hangboard’s typical weight limit of up to 400 lbs. Avoid attaching your hangboard directly to drywall or weak door frames; these surfaces often cannot handle dynamic loads and may break under your body weight. If you’re unsure about the strength of your chosen spot, consult a local contractor or experienced climber for advice.
Use the included hardware for the best fit, but double-check that the screws or bolts are long enough to anchor the hangboard securely. Most hangboards made from solid wood or high-density plastic will come with screws at least 2-3 inches long. If your kit lacks the right hardware, you can purchase strong lag bolts at a hardware store for around $5-$10. Always drill pilot holes to prevent splitting wood and to ensure precise alignment.
Follow the manufacturer’s recommended distance from the ceiling and the floor. As a rule of thumb, mount the hangboard at least 6-8 inches above any door frame, leaving enough space for your head and arms while hanging. Use a level to make sure the board sits straight, which helps distribute force evenly and prevents uneven wear or unexpected accidents.
After installation, test the stability by gradually loading the hangboard. Hang with your feet on a chair or box first, applying partial body weight for 15-20 seconds. Listen for any creaks or shifting sounds. If it feels secure, progress to full bodyweight hangs. If you notice movement or loose screws, stop immediately and reinforce the installation before continuing your training routine.
Common mistakes include using short screws, mounting to drywall without anchors, or skipping the pilot holes. These errors can result in the board ripping out of the wall, risking serious injury. Always check for hidden wires or pipes before drilling, and never exceed the stated weight limit of your hangboard. If you rent your home, consider portable doorway frames or free-standing rigs to avoid permanent modifications.
Proper installation not only keeps you safe but also extends the life of your hangboard and your home. By following these steps and the manufacturer’s instructions, you set yourself up for years of effective grip training, helping you unlock your climbing potential using the ultimate guide to hangboards.
How Do You Start Hangboard Training Without Risking Injury?
Starting hangboard training safely is all about patience and control. The key is to begin with short, manageable hangs—think 5 to 7 seconds per rep—using larger edges or jugs on your hangboard. This approach limits the strain on your fingers and tendons, which are not used to bearing your full body weight in such a concentrated way. Many new climbers make the mistake of jumping to small crimps or aiming for long sets, but that’s a fast track to injury, especially for your pulleys and tendons.

Before you even touch the hangboard, take at least 10 minutes to warm up your arms, shoulders, and fingers. Simple exercises like arm circles, gentle pull-ups, and squeezing a soft ball can get blood flowing and make your tendons more pliable. A cold start is risky—climbing injuries often happen when you skip the warm-up. Once you’re ready, start with just 3 to 5 sets of short hangs, resting at least 1 minute between reps. If you’re new to hangboarding, stick to two sessions a week and always take at least 48 hours between workouts to let your fingers recover.
As you adapt, you can gradually increase the intensity. Add a second or two to your hang time every week, or try slightly smaller holds, but never ramp up both at once. If you can easily hold the edge for 10 seconds for all reps, it might be time to advance. Avoid adding extra weight or using the smallest pockets until you’ve built a base over 4 to 6 weeks. Remember, most hangboards are made from solid wood or high-density plastic, and while they can support up to 400 lbs, your tendons can’t handle that kind of progression overnight. Progression is about consistency, not pushing to failure.
Listen to your body. Soreness in your forearms is normal, but sharp pain in your fingers or elbows is a red flag. Stop and rest if you notice any twinges or swelling. Always prioritize recovery—overuse injuries can sideline your climbing goals for months. Rest days are part of the process, not a setback. If you’re unsure about your form, film a session or ask an experienced climber for feedback. Hangboarding is a powerful tool to unlock your climbing potential, but only if you respect the gradual path to strength.
One common mistake is copying advanced routines you find online, which often feature single-arm hangs or tiny micro edges. These are for climbers with years of training, not beginners. Instead, focus on building a routine you can complete with perfect form every rep. Track your progress in a notebook or app so you don’t ramp up too quickly. By keeping your training controlled and progressive, you’ll build durable finger strength and reduce your risk of injury, setting yourself up for long-term climbing success.
"Most hangboards support weights up to 400 lbs."True
This is true. According to fitness fact sources, most hangboards are designed to handle weights up to 400 lbs, making them suitable for a wide range of users, including those who add extra weight for advanced training.
"You can skip warming up before using a hangboard."False
This is false. Skipping a warm-up increases your risk of finger and tendon injuries. Warm up with light aerobic activity and dynamic stretches to prepare your muscles and tendons for the intense load of hangboard exercises.
Which Hangboard Is Right for Your Climbing Goals?
Choosing the right hangboard is essential if you want to unlock your climbing potential. The ultimate guide to hangboards always starts with your current skill level and specific goals. For beginners, a hangboard with larger, rounded holds and a skin-friendly surface makes training safer and more enjoyable. Wooden hangboards excel here because their smooth texture reduces skin damage and allows you to focus on building grip strength without worrying about painful flappers or calluses.
Advanced climbers, on the other hand, often benefit from boards that offer a variety of pocket depths and smaller edges. These features simulate the diverse holds you’ll encounter outdoors, letting you target specific weaknesses in finger strength or contact power. Many high-end hangboards come with multiple edge sizes, from 30 mm down to 10 mm, so you can gradually progress as your fingers get stronger. High-density plastic boards also provide good durability if you plan on intensive daily sessions, but they can be rougher on skin during longer workouts.
Before you buy, take a close look at your space and mounting options. Most hangboards come with all the mounting hardware you’ll need, but you should make sure your wall can handle the load. A standard hangboard supports up to 400 lbs, so installation on a solid wood beam or masonry wall is best. If you rent or want something portable, consider a doorframe-mounted or freestanding option, though these may be less stable for weighted hangs.
Budget plays a role, too. Entry-level hangboards start around $40 and offer basic holds, while premium models with varied pockets, jugs, and slopers can reach $120 or more. Wooden boards tend to cost a bit extra but pay off in durability and comfort. If you’re just starting, you don’t need every feature—prioritize comfort and the ability to use both open-handed and crimp grips safely.
A common mistake is to jump straight to the smallest edges or advanced models before you’ve built a base of strength. Overloading your fingers can lead to injury and stall your progress. Instead, look for a board that matches your current ability and lets you progress in small, measurable steps. For example, start with 10-second hangs on 25 mm edges and move to smaller holds only after several weeks of consistent training.
Finally, remember that a hangboard is just one tool in your climbing toolkit. Consistent, mindful use helps you build grip strength, while poor form or overtraining can set you back. Take rest days, track your progress, and adjust your board setup as your needs evolve. This way, you’ll get the most from your investment and keep moving toward your climbing goals.
FAQ
What is a hangboard used for in climbing?
A hangboard is a training tool designed to improve grip strength and finger endurance, which are critical for climbing. Climbers use hangboards to simulate various holds and target specific muscle groups that are often the limiting factor on harder routes.
How do I choose the right hangboard for my home?
Select a hangboard based on your skill level, preferred material (wood or plastic), and the space you have available. Beginners should look for larger holds and rounded edges, while advanced climbers may want a board with a variety of pocket sizes and edge depths.
Can beginners use hangboards safely?
Yes, beginners can use hangboards if they start with simple exercises, keep sessions short (less than 10 minutes), and follow a gradual progression. It's important not to overload the fingers early on to prevent injury.
How often should I train on a hangboard?
Most climbers benefit from 2-3 sessions per week, with rest days in between to allow for recovery. Each session typically involves 5-10 sets of hangs, depending on experience level and training goals.
Do hangboards come with installation hardware?
Most hangboards include mounting hardware to make installation easier, whether you're setting it up on a wall or a door frame. Always follow the manufacturer's instructions for safe and secure mounting.
Related Products
Practical VVZIO equipment that matches the training focus of this article.
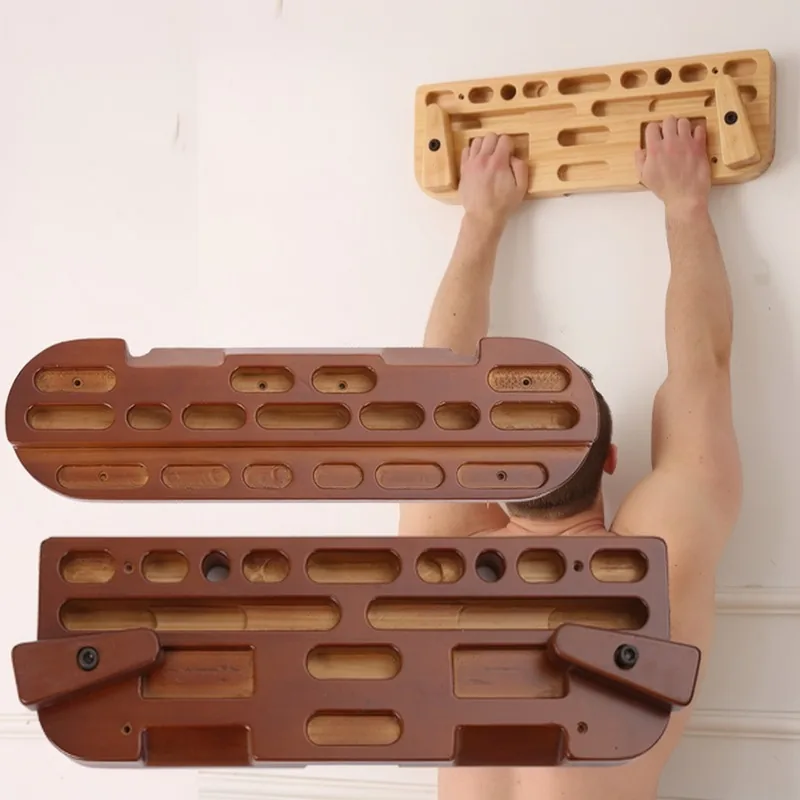
Portable Wooden Climbing Hangboard
This portable wooden climbing hangboard directly matches the article's focus on hangboard training for improving grip and finger strength at home.
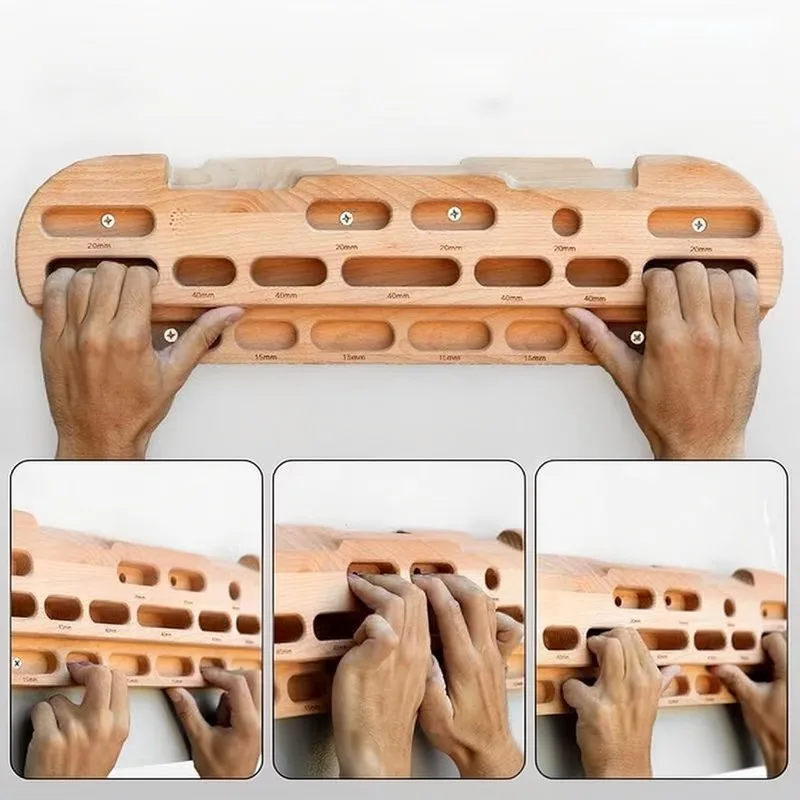
Wooden Hangboard for Finger Strength Training
The wooden hangboard is designed for finger strength training, featuring multiple edge depths and sloper slots as described in the article's training recommendations.
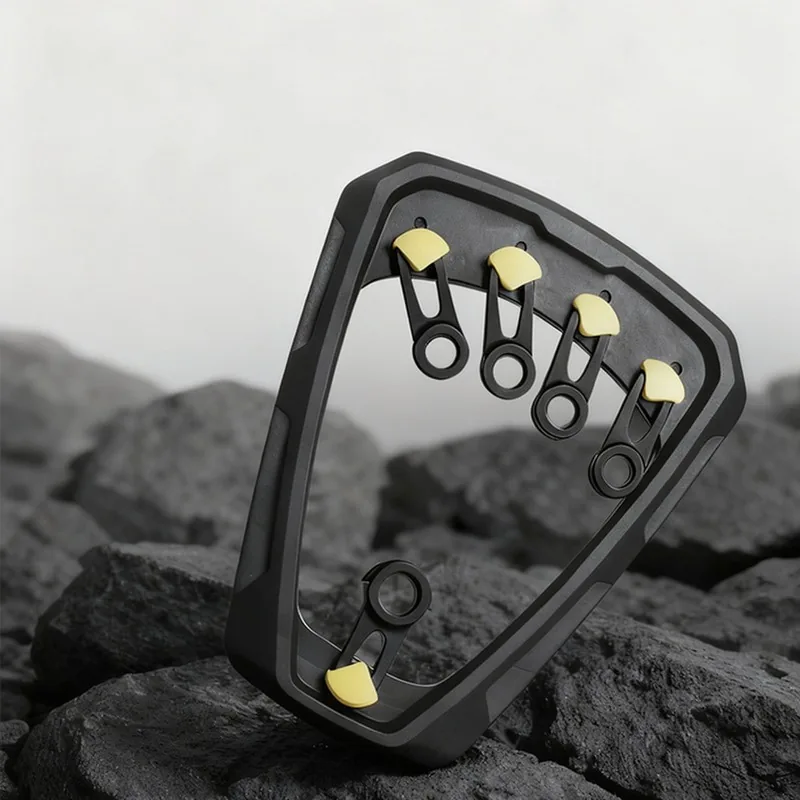
3-Level Adjustable Rotating Finger Strength Trainer
The 3-level adjustable rotating finger strength trainer targets finger and forearm muscles, supporting the article's emphasis on progressive grip and finger endurance training for climbers.
Related reading

Comparison of Wooden vs. Plastic Hangboards: Which Is Best for Home Strength Training?
Choosing between wooden and plastic hangboards can impact both your grip training and comfort. Wooden hangboards offer a…Is Rock Climbing Difficult for Beginners? What to Expect and How to Start
Rock climbing can seem intimidating for beginners, but many find it accessible with the right approach and consistent…Best Practices for Hangboard Training: Safe & Effective Grip Gains
Hangboard training is a proven method for building grip strength, essential for both beginner and advanced climbers. Effective…