









Best Practices voor Hangboard Training: Veilige en Effectieve Gripverbetering
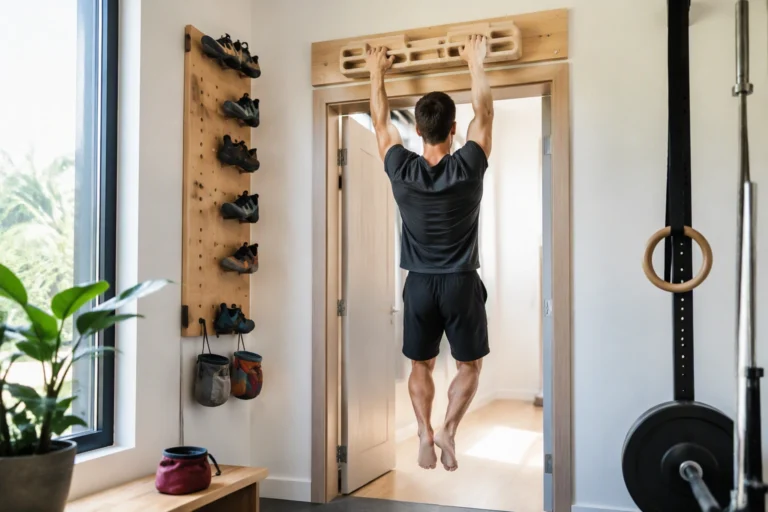
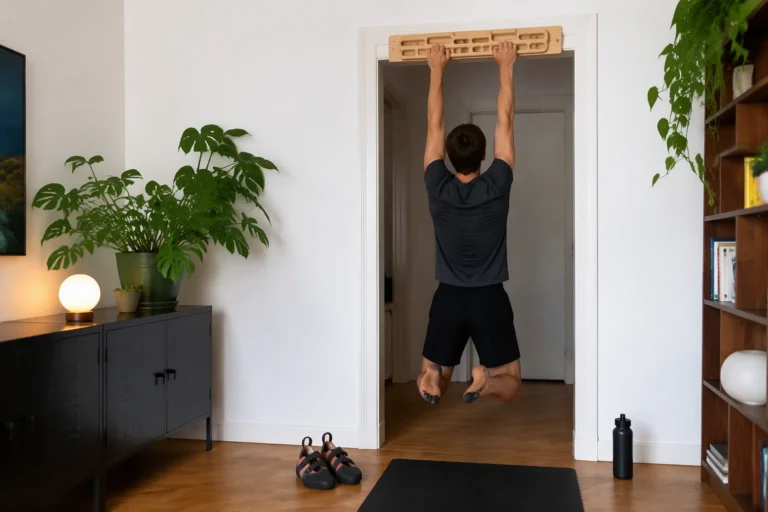
Hangboard training is a proven method for building grip strength, essential for both beginner and advanced climbers. Effective routines include exercises like dead hangs, pull-ups, and offset hangs, and the right approach can help prevent injury while maximizing gains. Choosing a quality hangboard and following safe, progressive practices ensures lasting improvement in climbing performance.
If you’re new to climbing or just getting serious about your training, it’s easy to feel overwhelmed by the sheer number of grip-strength routines out there. Maybe you’ve tried a few hangboard sessions, only to end up with sore fingers or nagging aches that make you question whether you’re doing it right. The frustration of slow progress and the fear of injury can leave you wondering if hangboard training is really worth the risk, especially when you just want to improve your climbing without sidelining yourself.
Hangboard training is more than a trendy workout; it’s a proven way to target the finger and forearm strength you need for harder climbs. But without a clear plan and safe technique, those gains can be elusive or even lead to setbacks. Understanding the best practices for hangboard training is essential—not just for maximizing your grip strength, but for making your sessions efficient and injury-free. With the right approach, you can build confidence, see measurable improvements, and avoid the pitfalls that keep many beginners from reaching their climbing goals.
- Hangboards target grip strength with varied exercises.
- Start with dead hangs and progress gradually.
- Use multiple grip positions to prevent plateau.
- Quality boards like Two Stones suit all skill levels.
- Consistent, safe training reduces injury risk.
Waarom Hangboardtraining Belangrijk is voor Klimmers
Grip strength is a cornerstone of climbing performance, influencing your ability to hold edges, pinch volumes, and stay secure on steep terrain. Without strong fingers and hands, even the best footwork can only take you so far up the wall. Hangboard training matters because it provides a direct, measurable way to boost grip strength and overcome common limitations that climbers face on both plastic and rock.

Hangboards are engineered specifically for developing grip and finger strength, offering a variety of holds—like jugs, edges, and pockets—to simulate real climbing challenges. By focusing on these specific grip types, you can systematically improve the muscles and tendons that keep you connected to the wall. Using a hangboard, you can perform exercises such as dead hangs, pull-ups, and offset hangs, holding positions for 7 to 12 seconds per rep. This targeted approach is more effective than general strength training for your climbing needs.
Consistency is key in hangboard training. Committing to two or three sessions per week, each lasting about 20 minutes, allows for gradual, safe adaptation. Beginners often benefit from starting with larger holds and longer rest intervals, while advanced climbers can challenge themselves with smaller edges or one-arm hangs. Whether you’re new to climbing or projecting your first V6, regular hangboard use helps you track progress and reach new goals without risking overuse injuries from too much unstructured climbing.
Many hangboards, such as the popular Two Stones Hangboard, cater to all skill levels and cost around $40–$60. Their multi-functional design means you can train several grip positions in one session, adapting the workout as you advance. This versatility keeps your training fresh and helps prevent plateaus, which is crucial for long-term improvement. If you train consistently, you’ll notice increased confidence on small holds and more control during powerful moves within a few months.
One mistake to avoid is jumping into advanced hangs or max-weight protocols too soon. Progress slowly, focusing on good form and listening to your body. Overloading your fingers early can lead to tendon injuries that will sideline your climbing for weeks. Instead, master basic hangs first, then gradually add difficulty by reducing hold size or increasing load. Tracking your sets, reps, and rest times in a simple notebook or app will also help you spot trends and adjust your routine for maximum results.
Hangboard training isn’t just for elite climbers. Whether you’re pulling on jugs in the gym or crimping on outdoor granite, integrating hangboard sessions into your weekly routine supports steady improvement at any level. With the right setup and a commitment to consistency, you’ll build the grip strength you need for lasting climbing progress.
What Are the Best Hangboard Exercises?
The best hangboard exercises are those that build foundational grip strength, add intensity, and target a variety of climbing muscles. Starting with dead hangs is the safest and most effective way to begin your hangboard routine. In a dead hang, you simply grip a set hold and let your body hang for a set time—typically 7 to 10 seconds per rep, with 5 to 7 reps per session. This basic move strengthens your fingers, forearms, and shoulders, forming the baseline for more advanced exercises.

As you become comfortable with dead hangs, you can introduce pull-ups on the hangboard to increase upper body engagement and overall intensity. Standard pull-ups work your lats and biceps, but the challenge comes from using the smaller grips on the board. Aim for 3 sets of 3 to 5 pull-ups, resting at least two minutes between sets to avoid overuse injuries. If you find regular pull-ups too difficult, try assisted variations using resistance bands or placing a foot on a chair.
Offset hangs add another layer of difficulty and simulate the uneven grip demands of real climbing. In an offset hang, you grip two different holds at different heights or depths, shifting more weight to one hand. Hold for 5 to 8 seconds per side and switch hands after each rep. This exercise targets imbalances and helps you develop the unilateral strength you’ll need on the wall.
Mixing up your grip types is key for balanced hangboard training. Most high-quality hangboards, like the Two Stones Hangboard, offer a variety of holds—including jugs, edges, and pockets. Jugs are large, rounded holds that are great for beginners and warm-ups. Edges are thin, flat holds that challenge your finger pads and require precise engagement. Pockets isolate one or two fingers at a time, demanding focused strength. Rotate between these grip types in your sessions to ensure you’re strengthening all the muscles and tendons used in climbing.
For a sample session, you might begin with 5 reps of 10-second dead hangs on jugs, rest two minutes, then do 3 sets of 5-second offset hangs on edges, and finish with 2 sets of 5-second pocket hangs per hand. Always warm up your fingers and shoulders beforehand, and never exceed your current ability—overtraining is a common mistake that leads to finger injuries. If you feel pain beyond normal muscle fatigue, stop immediately and reassess your form or take extra rest days.
Another mistake to avoid is ignoring the importance of rest between sets and sessions. Your connective tissue, especially in your fingers, needs plenty of time to recover and adapt. Training grip strength on the hangboard just 2 to 3 times a week is enough for most climbers, with at least 48 hours between sessions. Tracking your hang times and grip types in a notebook or app can help you spot progress and prevent overuse.
Remember, the best practices for hangboard training involve a mix of foundational dead hangs, challenging pull-ups, and targeted offset hangs, all performed on different grip types. By building up slowly, varying your holds, and prioritizing rest, you’ll see safe, effective gains in grip strength that translate directly to better climbing performance.
"Hangboard training can significantly improve grip strength for climbing."Waar
This is true. Consistent use of a hangboard with exercises like dead hangs and pull-ups targets the forearm and finger muscles, which are key for climbing performance.
"Only advanced climbers benefit from hangboard workouts."Onwaar
This is false. Beginners can also use hangboards effectively by choosing appropriate grips and durations, gradually building strength without risking injury.
How Can Beginners Train Safely on a Hangboard?
Hangboard.

Gradual progression is key to avoiding tendon injuries, which are common when you ramp up intensity too quickly. After two to three weeks of consistent training—about two sessions per week—you can begin to add time or difficulty. Increase your hang duration by 2-3 seconds every week, or try more challenging grip types like medium edges. Avoid the temptation to add pull-ups or offset hangs until you’ve built a solid foundation. If you feel any sharp pain or discomfort, stop immediately and reassess your technique and rest schedule. Overuse injuries often stem from impatience, so stick to slow, steady gains.
Rest is just as important as the workout itself. Hangboard training places a lot of stress on your fingers, tendons, and forearms, which need time to recover and grow stronger. For beginners, spacing sessions 48-72 hours apart is recommended to allow full recovery. You should never train grip on consecutive days, even if your muscles feel ready, since tendons heal much more slowly. If you notice lingering soreness or stiffness, extend your rest period and use gentle stretching or massage to aid recovery. Ignoring signs of fatigue is one of the biggest mistakes new climbers make.
Many hangboards, such as the Two Stones Hangboard, offer multiple grip sizes and types, so you can easily scale your sessions as your strength improves. Start with the largest holds and gradually explore smaller edges and pockets as your confidence grows. Record each session—hang times, rest periods, grip used—to track progress and identify patterns. This log not only motivates you but helps spot early warning signs of overuse. Avoid adding extra weight or advanced exercises until you consistently handle 15-20 second hangs with good form.
If you’re unsure about your technique, consider watching instructional videos from reputable climbing coaches or visiting a local climbing gym for a quick assessment. Proper form is the foundation for safe, effective training, and small tweaks can prevent big problems down the line. Always warm up before your session with 5-10 minutes of gentle stretching or arm circles, and cool down with finger extensions or forearm massage. With patience and consistency, beginners can safely build grip strength and avoid common pitfalls on the hangboard.
De juiste hangboard kiezen voor jouw behoeften
De juiste hangboard is a crucial first step for safe and effective grip training. The best practices for hangboard training start with selecting a board that offers multiple grip types, such as jugs, edges, and pockets. This variety allows you to target different muscles and progress your workouts over time. Boards with diverse holds make it possible to perform dead hangs, pull-ups, and offset hangs, which are all commonly used exercises for improving grip strength in climbers.

If you're looking for a proven option, the Two Stones Hangboard is a standout for both its quality and price. It's frequently recommended because it suits all skill levels, from beginners to advanced climbers. You can find the Two Stones Hangboard for around $39–$59 depending on the model and retailer. Its durable construction and well-spaced holds help you maintain proper form, reducing the risk of injury during training sessions.
Before purchasing, consider your current skill level and the space you have available for mounting. If you're a beginner, avoid boards with only small crimps or challenging pockets; these can strain your fingers and lead to overuse injuries. Instead, start with a hangboard that includes larger jugs and comfortable edges. For advanced climbers, boards with smaller edges and deeper pockets provide a greater challenge, but make sure you have the finger strength to use them safely.
Ook de montagelocatie is belangrijk. Meet uw muur of deuropening om te zorgen dat het gekozen hangbord past en stevig kan worden geïnstalleerd. Sommige borden vereisen specifieke schroeven of beugels, controleer daarom de productdetails voordat u koopt. Onjuiste installatie kan het trainen onveilig maken—volg altijd de montagerichtlijnen van de fabrikant en test de stabiliteit vóór gebruik. Als u huurt of niet in muren mag boren, zoek dan naar draagbare hangborden die aan optrekstangen kunnen worden bevestigd of gebruikt kunnen worden met balkbanden.
Veel beginners maken de fout om borden te kiezen die indrukwekkend lijken maar te geavanceerd zijn voor hun huidige vaardigheden. Dit beperkt niet alleen uw vooruitgang, maar verhoogt ook het risico op vingerblessures. Kies een bord dat aansluit bij uw behoeften en trainingsdoelen. Bijvoorbeeld, een bord met minstens drie verschillende griptypes stelt u in staat om uw trainingen te variëren en geleidelijk kracht op te bouwen. Begin met dead hangs van 10–20 seconden per herhaling, gebruikmakend van comfortabele grepen, en verhoog de moeilijkheid alleen wanneer u perfecte vorm kunt behouden zonder pijn.
Een andere veelvoorkomende fout is het negeren van de textuur van het bord. Borden met een te ruwe oppervlakte kunnen huidschuurplekken veroorzaken, terwijl zeer gladde borden glad en onveilig kunnen zijn, vooral als uw handen zweten tijdens het trainen. De Two Stones Hangboard heeft een gebalanceerde textuur die voldoende wrijving biedt zonder uw huid te beschadigen. Test een bord indien mogelijk persoonlijk, of lees beoordelingen voor feedback over textuur en duurzaamheid. Tijd investeren in het vinden van het juiste bord zorgt ervoor dat uw training zowel effectief als duurzaam is, wat u voorbereidt op langdurige gripverbeteringen.
"Het gebruik van verschillende gripposities op een hangbord voorkomt trainingsplateaus."Waar
Dit is correct. Borden met meerdere griptypes—zoals jugs, randen en pockets—stellen gebruikers in staat oefeningen te variëren en verschillende spiergroepen te trainen, wat voortdurende vooruitgang ondersteunt.
"Langere hangtijden leiden altijd tot betere resultaten op een hangbord."Onwaar
Dit is onjuist. Te lange hangs kunnen het risico op blessures vergroten, vooral voor beginners. Vooruitgang komt door juiste vorm en geleidelijke verhogingen, niet alleen door langere duur.
Tips voor Vooruitgang en Blessurepreventie
Veilig vooruitgang boeken met hangboardtraining betekent het verhogen van de moeilijkheid in kleine, beheersbare stappen in plaats van grote sprongen te maken. U kunt in de verleiding komen om direct vijf kilo extra toe te voegen of een moeilijkere rand te proberen, maar dit kan uw pezen overbelasten en leiden tot blessures. Voeg in plaats daarvan weerstand toe in stappen van 1-2 kg, verkort de hangtijd met 2-3 seconden, of verminder de rustperiodes geleidelijk over twee tot drie weken. Dit helpt uw lichaam zich aan te passen en vermindert het risico op overbelastingsblessures, vooral voor beginners die nog peessterkte ontwikkelen.
Goede warming-ups en cooling-downs zijn essentieel voor effectieve hangboardsessies. Begin elke sessie met 10-15 minuten algemene aerobe activiteit zoals joggen of jumping jacks om uw hartslag te verhogen, gevolgd door minstens 5 minuten licht klimmen of vingerbewegingen op jugs en grotere grepen. Dit bereidt uw vingers en onderarmen voor op de belasting van dead hangs en pull-ups. Na de training besteedt u 5-10 minuten aan het rekken van uw onderarmen, polsen en schouders om de bloedcirculatie en het herstel te bevorderen. Het overslaan van warming-ups verhoogt het risico op pulleyblessures en spierverrekkingen, terwijl het negeren van cooling-downs kan leiden tot stijfheid en vertraagde genezing.
Luister naar uw lichaam om blessures tijdens hangboardtraining te voorkomen. Als u scherpe pijn, aanhoudende gevoeligheid of zwelling in uw vingers of ellebogen opmerkt, verminder dan onmiddellijk uw trainingsvolume. Bijvoorbeeld, als u normaal vijf sets van 10 seconden dead hangs uitvoert, ga dan terug naar drie sets of verkort de hangtijd tot 6-8 seconden totdat het ongemak afneemt. Vermijd door pijn heen trainen, omdat dit kleine problemen kan veranderen in chronische blessures die uw vooruitgang maandenlang stilleggen. Als de symptomen langer dan twee dagen aanhouden, neem dan een pauze van hangboardtraining en raadpleeg een sportarts.
Een veelgemaakte fout is het behandelen van hangboardsessies als een wedstrijd, hetzij met uzelf of met anderen. Het vergelijken van uw vooruitgang met meer gevorderde klimmers kan ertoe leiden dat u uw progressie overhaast of fundamentele oefeningen overslaat. Focus op uw eigen geleidelijke verbeteringen, of dat nu het vasthouden van een 20mm rand is voor 8 seconden of het toevoegen van 1 kg aan uw dead hangs. Een andere fout is te vaak trainen; beperk hangboardsessies tot twee of drie keer per week, vooral als u nieuw bent in griptraining. Uw pezen hebben tijd nodig om te herstellen en sterker te worden tussen de sessies door, dus rustdagen zijn net zo belangrijk als trainingsdagen.
Samenvattend omvatten de beste praktijken voor hangboardtraining het geleidelijk verhogen van de moeilijkheid, altijd goed opwarmen en afkoelen, en nauwlettend letten op hoe uw lichaam aanvoelt. Door deze stappen te volgen, vermindert u het risico op blessures en ziet u gestage verbeteringen in gripkracht. Blijf geduldig en consistent, en u bouwt de basis voor sterkere en veiligere klimprestaties.
Veelgestelde vragen
Hoe vaak moet ik als beginner trainen op een hangboard?
Beginners moeten beginnen met 1-2 hangboard-sessies per week, waarbij ze minimaal 48 uur rust tussen de trainingen inlassen. Dit schema ondersteunt het herstel van pezen en vermindert het risico op overbelastingsblessures.
Wat is de veiligste hangboard-oefening om mee te beginnen?
Dead hangs aan grote grepen (jugs) zijn de veiligste startoefening, omdat ze de belasting op de vingers minimaliseren. Begin met 5-10 seconden hangen voor meerdere herhalingen en richt je op het behouden van een goede schouderactivatie.
Kan hangboardtraining helpen bij andere sporten naast klimmen?
Ja, hangboardtraining verbetert de grip en onderarmkracht, wat voordelig is voor sporten zoals obstakelraces, turnen en gewichtheffen, waarbij sterke handen en vingers belangrijk zijn.
Hoe weet ik welke hangboard maat of stijl ik moet kopen?
Kies een hangboard met meerdere greepopties en een ontwerp dat past bij uw beschikbare ruimte. De Two Stones Hangboard, bijvoorbeeld, biedt een reeks grepen en is geschikt voor zowel beginners als gevorderde gebruikers.
Is het normaal dat mijn vingers pijnlijk aanvoelen na hangboard-sessies?
Milde spierpijn is gebruikelijk, maar scherpe pijn of aanhoudend ongemak niet. Als uw vingers langer dan 24-48 uur pijn doen, verminder dan de intensiteit en neem meer hersteltijd om blessures te voorkomen.
Gerelateerde producten
Praktische VVZIO-uitrusting die aansluit bij de trainingsfocus van dit artikel.
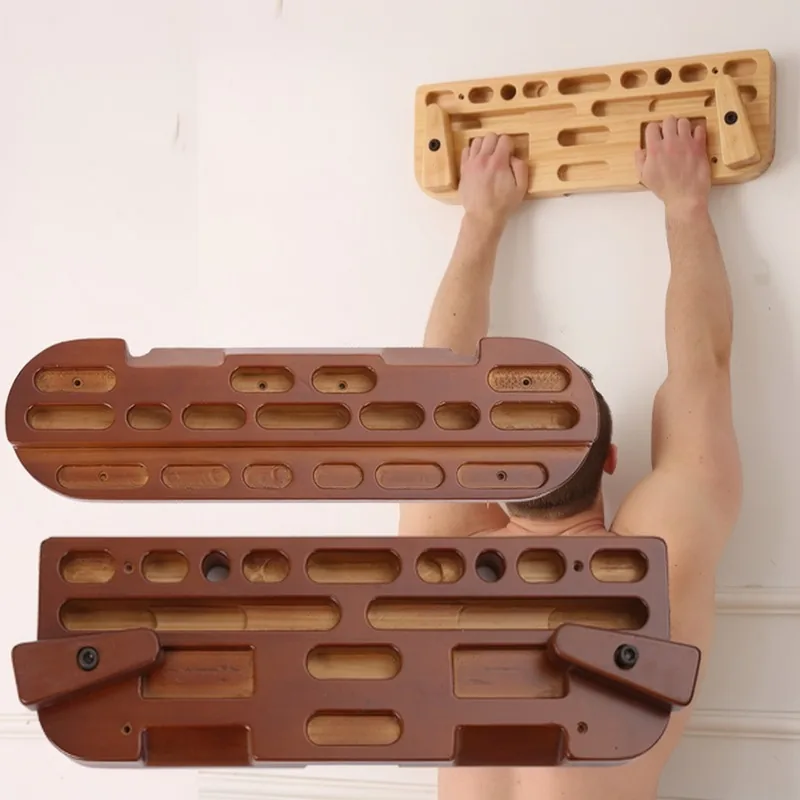
Draagbaar houten klimhangbord
Dit draagbare houten klimhangbord ondersteunt direct een veilige en effectieve training van grip- en vingerkracht zoals besproken in het artikel.
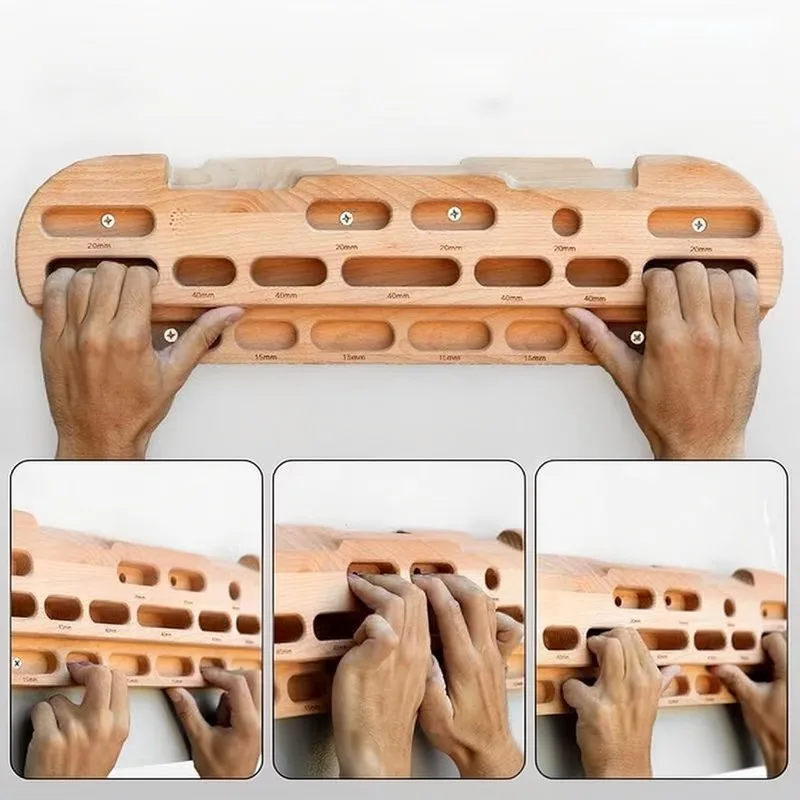
Houten Hangbord voor Vingerkrachttraining
Het houten hangbord biedt meerdere randdieptes en sloperopeningen, ideaal voor progressieve hangboardroutines en gevarieerde gripposities zoals aanbevolen in het artikel.
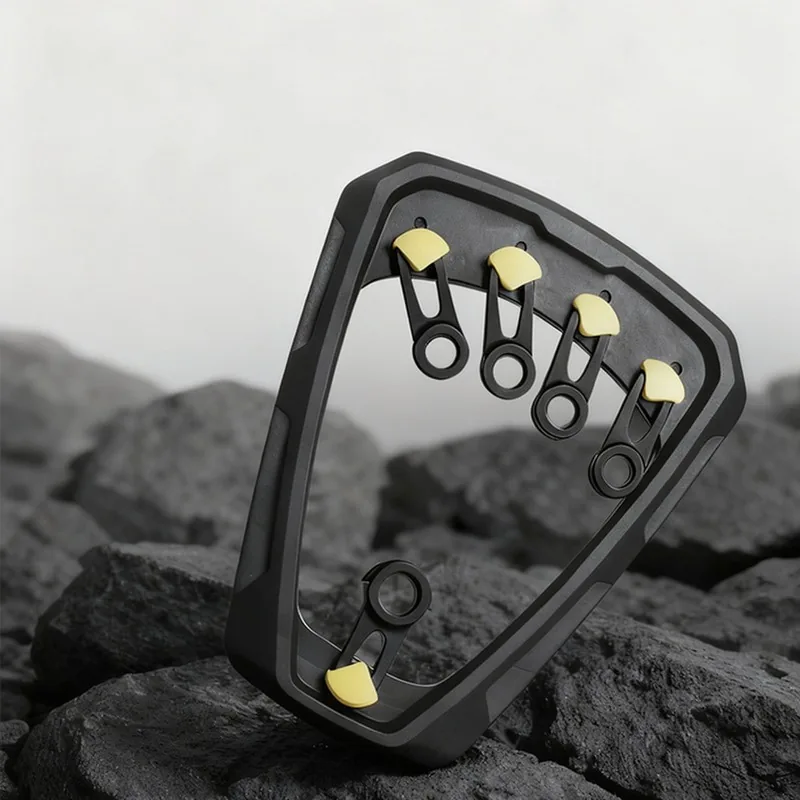
3-standen Verstelbare Roterende Vingerkrachttrainer
De verstelbare roterende vingerkrachttrainer richt zich op vinger- en onderarmkracht en vormt een aanvulling op hangboardoefeningen voor klimmers die gripverbeteringen nastreven.
Gerelateerde artikelen

Voordelen van het gebruik van een hangboard voor klimmers: kracht, veelzijdigheid en praktische tips
Hangboards zijn gespecialiseerde trainingshulpmiddelen die klimmers helpen bij het opbouwen van vinger- en gripkracht, waardoor ze essentieel zijn voor het verbeteren van…Hangboardtraining: Het Ultieme Geheim voor Vooruitgang bij Klimbeginners
Hangboardtraining is een zeer effectieve manier voor beginnende klimmers om gripkracht op te bouwen en de vooruitgang te versnellen. Door…De rotswand binnen handbereik: hoe een hangboard je klimpotentieel ontgrendelt
Een hangboard biedt klimmers een praktische manier om gripkracht en vingeruithoudingsvermogen op te bouwen, beide cruciaal voor het aanpakken van…